Using a Force Sensitive Resistor with a Raspberry Pi which I couldn't find anywhere else on the Internets, so I had to write this
Using a force sensitive resistor with a Raspberry Pi isn’t terribly complicated, but I didn’t see it documented elsewhere on the Internet, so here are my notes.
Ingredients
Assuming you have a Raspberry Pi and the desire to measure the existence of some pressure, this is what else you’ll need:
- a Pi Cobbler that will let you attach the Pi to a breadboard with a ribbon cable
- a breadboard so you can plug everything in
- a force sensitive resistor (really, without this you can skip the rest of this blog post)
- a MCP3008 analog to digital converter to convert the analog signals from
the FSR to digital signals that the Raspberry Pi can read
You can get a different ADC, but then these instructions will need some interpretation.
- some wires to make connections on the breadboard
- a 10k Ohm resistor
I’ve linked these to AdaFruit and RadioShack, but that’s just because that’s what Google told me first, and that’s where I’ve ordered most of my components; I have no affiliation with either of them.
Wiring
Most of the wiring information I got was from AdaFruit’s instructions at Reading a Analog Input…, which I’ll gratefully paraphrase here.
First, attach the Pi Cobbler and th MCP3008 to the breadboard along the center (see the diagram below).
Next, wire the Pi Cobbler to the MCP3008 following these instructions:
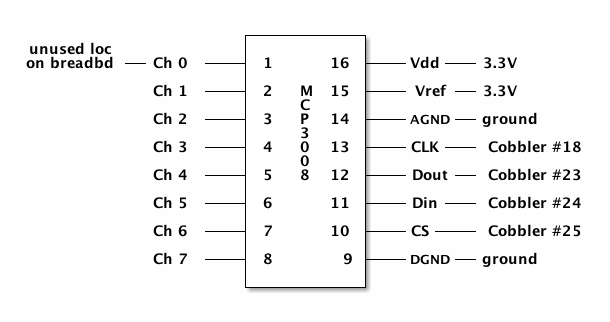
On the same unused location on the breadboard where Channel 0 is connected, connect one of the leads from the FSR and connect that same row on the breadboard to ground using the 10kOhm resistor. If you leave this “pull-down resistor” out, the readings from the FSR will just flap all around and be useless (at least, so says a friend of mine who did that; you wouldn’t know him). Attach the other lead of the FSR to the power rail (a resistor without a current isn’t much good).
Finally, attach the 3v3 from the Pi Cobbler to the power rail of
the breadboard to deliver power to everything.
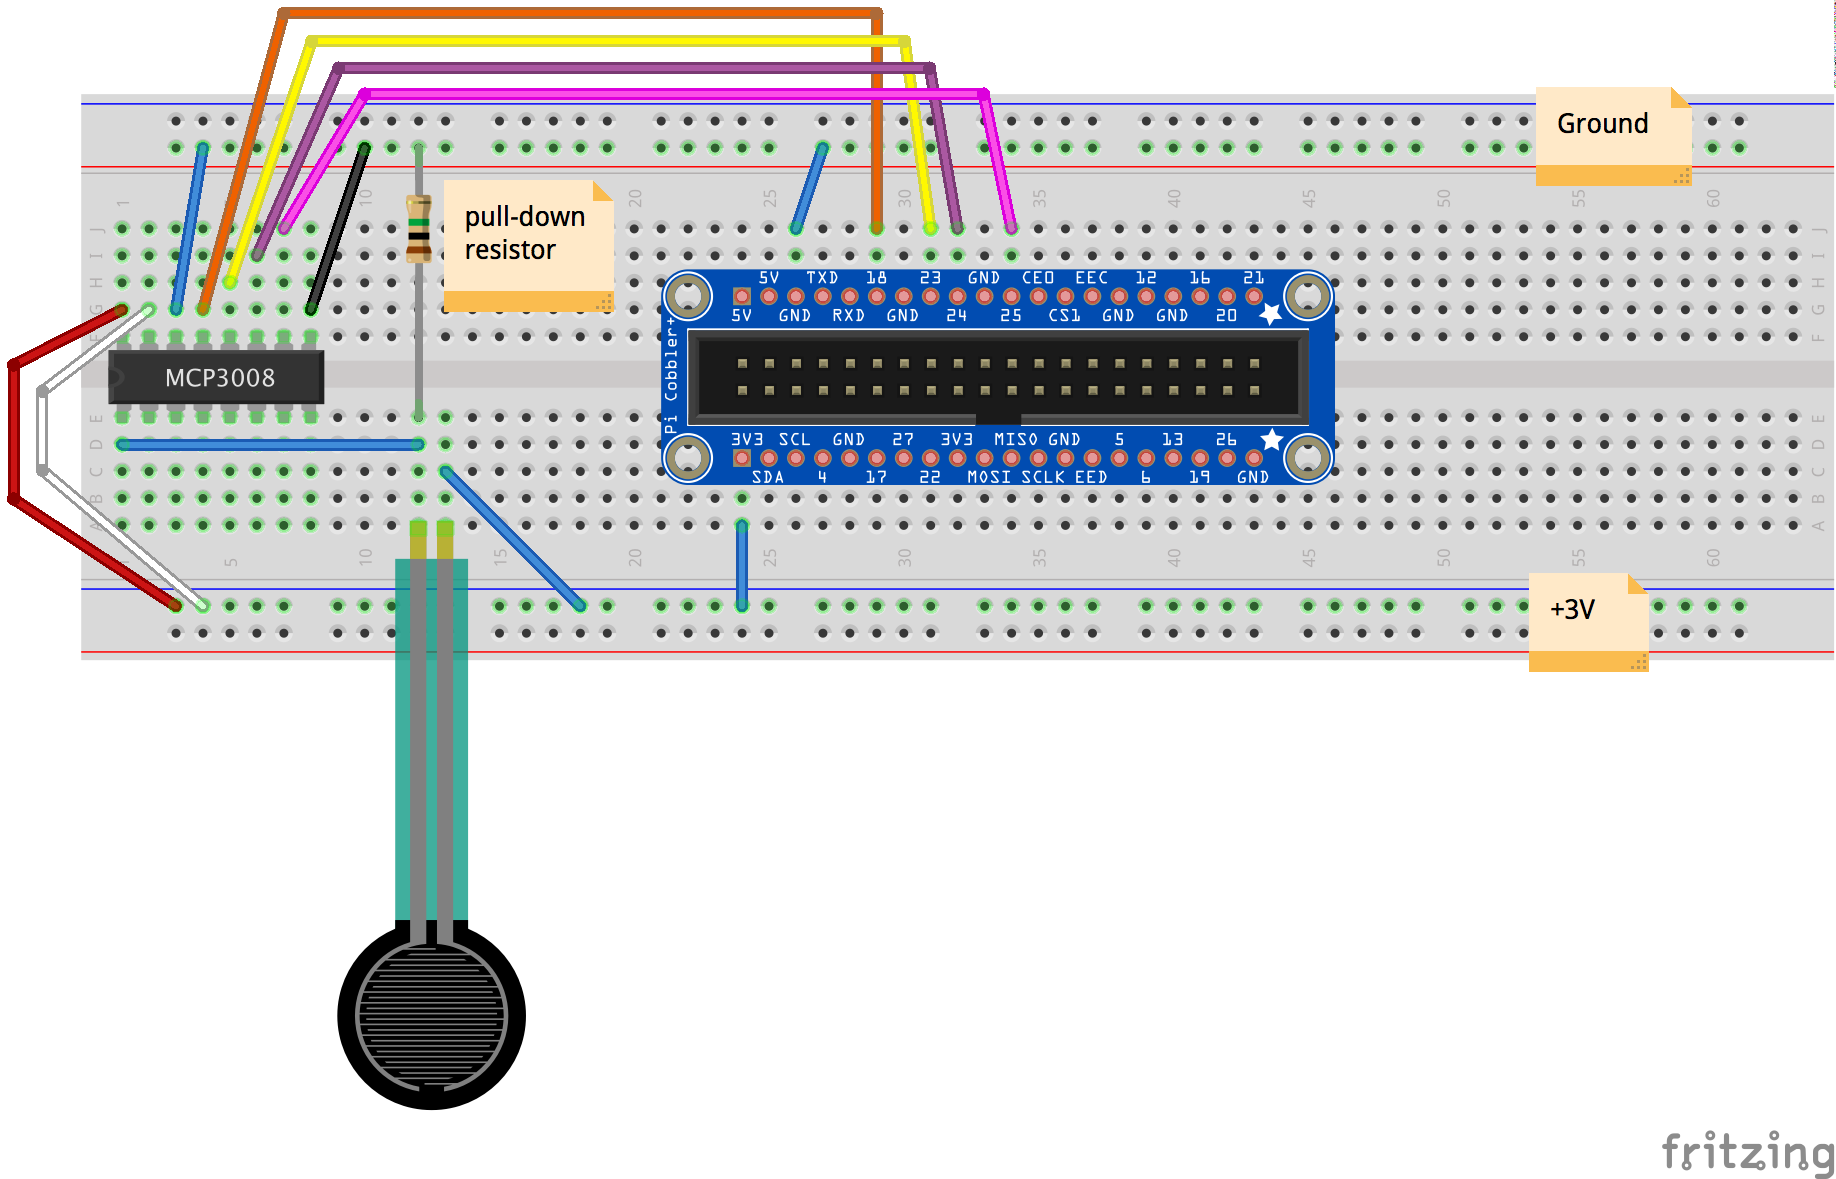
The end result should look something like this:
Reading values from the FSR
Again, most of the script I use for this came from AdaFruit, specifically from the Python script page in the instructions for Reading a Analog Input… that I mentioned above, although I did make some changes. My script is available at https://github.com/acaird/raspi-scale.
Running that script just prints out values between 0 and 1023, depending on how hard you squeeze the FSR. What you do with that data is up to you now. I plan to monitor my can of coffee beans, but you’ll have to check back later for the rest of that.