Using Github Actions to Build and Push Images to Google Container Registry look, it’s a little baby no-cost CI!
Even personal projects that make use of Google Cloud Run to minimize costs deserve CI. And they can get it!
I was following Alex Olivier’s blog post Deploy your side-projects at scale for basically nothing - Google Cloud Run (which, by the way, is really good and you should read it if you want to run web-apps at next to zero cost, for real) that obviously uses Google’s Cloud Run (which is Google’s knative service). Google’s Cloud Run requires that the related Docker image is in the Google Container Registry (GCR) (well, mostly requires that). This blog post is a follow-on to Alex’s blog post, so if you haven’t followed along with his steps, some of the assumptions I make might not be valid (or, at least, might be confusing), however, you can likely learn some things without reading Alex’s post but, honestly, are you so busy you can only read one blog post?
My code is in Github and I wanted to be able to build images and push them to GCR automatically so that I could later deploy them to Google Cloud Run. There is some starting configuration at https://github.com/actions/starter-workflows/blob/master/ci/google.yml that is pretty good, but it includes code to deploy to the Google Kubernetes Engine, which I didn’t need. It didn’t, however, include some details that would have been handy, which I hope to expound on in a useful way here…
Dearly beloved,
We are gathered here today
To get through this thing called “CI”
Magic word, “CI”
It means “continuous”, and that goes on for a long time
But I’m here to tell you there is something else
OK, not really. People really like CI in the late 20-teens, early 2020s.
So go crazy.
Sorry, your Purple-ness, that was unwarrented.
Linking Github and Google
The docker image is built at Github, then pushed to the Google Container Registry, so before even building the image, you should give Github access to your project’s GCR bucket.
There are a lot of nice notes at Google’s page titled Creating and
managing service account keys, but if you’ve started with Alex’s
blog post you probably have the gcloud client installed on your
computer, and these steps should help.
First, authenticate your local gcloud installation to your Google
account:
gcloud auth login
which will open your web brower and prompt you to log in to Google. If you’ve followed Alex’s post, you might already be logged in.
Second, you need to get the service account for your Google Cloud Run project (remember, see Alex’s blog post):
gcloud iam service-accounts list --project [project_name]
This will produce something like:
NAME                             EMAIL                                               DISABLED
Default compute service account  999999999999-compute@developer.gserviceaccount.com  False
The value that is in the EMAIL column is the IAM account that
needed to generate a key that will go into a GitHub secret. The
command to make that key is:
gcloud iam service-accounts keys \
       create ~/my_awesome_secret_key.json \
       --iam-account 999999999999-compute@developer.gserviceaccount.com \
       --project [project_name]
This command will write a key to the file
my_awesome_secret_key.json in your home directory. Don’t publish
this anywhere someone might find it or put it in a Git repository,
it is a private key to your Google cloud project.
The third and final step to connecting Github and your Google Cloud project is to put a base-64 encoded copy of your private key in a Github secret. From a Mac terminal, you can type:
cat ~/my_awesome_secret_key.json | base64 | pbcopy
to “copy” the base-64-encoded secret key to the clipboard. On Linux you can type:
cat ~/my_awesome_secret_key.json | base64 | xclip -selection -clipboard
to do the same. I don’t know how to base64-encode something or copy it to the clipboard from the command line on Windows, I suggest using Windows Subsystem for Linux if at all possible, but that’s a whole other thing.
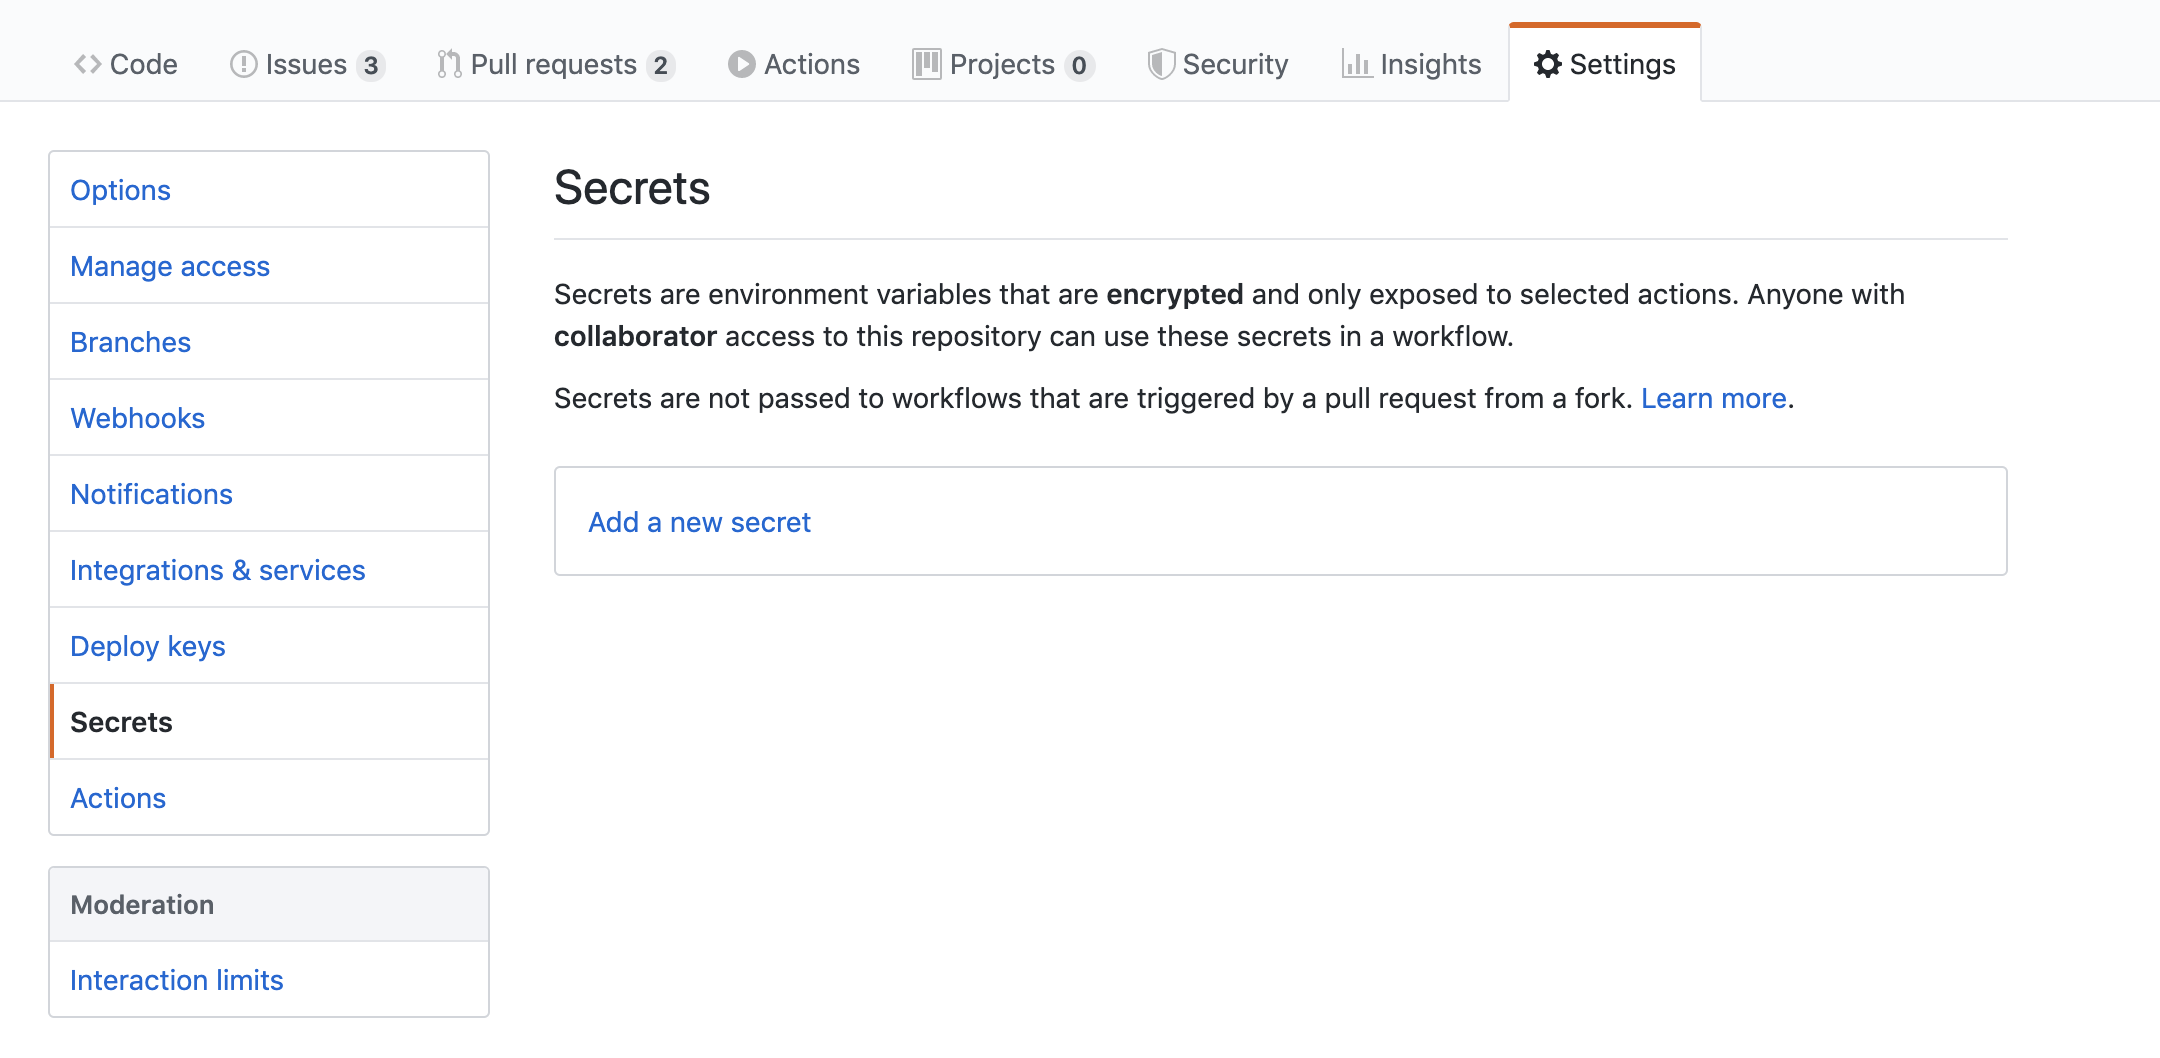
Once you have the base64-encoded key file, go to the project’s page at Github and, from the list of options along the top of the project (below the title), click “Settings” then from the menu on the left click “Secrets”. Click the “Add a New Secret” link in the middle of the page.

Figure 1: The Github Project Page’s Secrets Management Tab Click the “Add a new secret” link
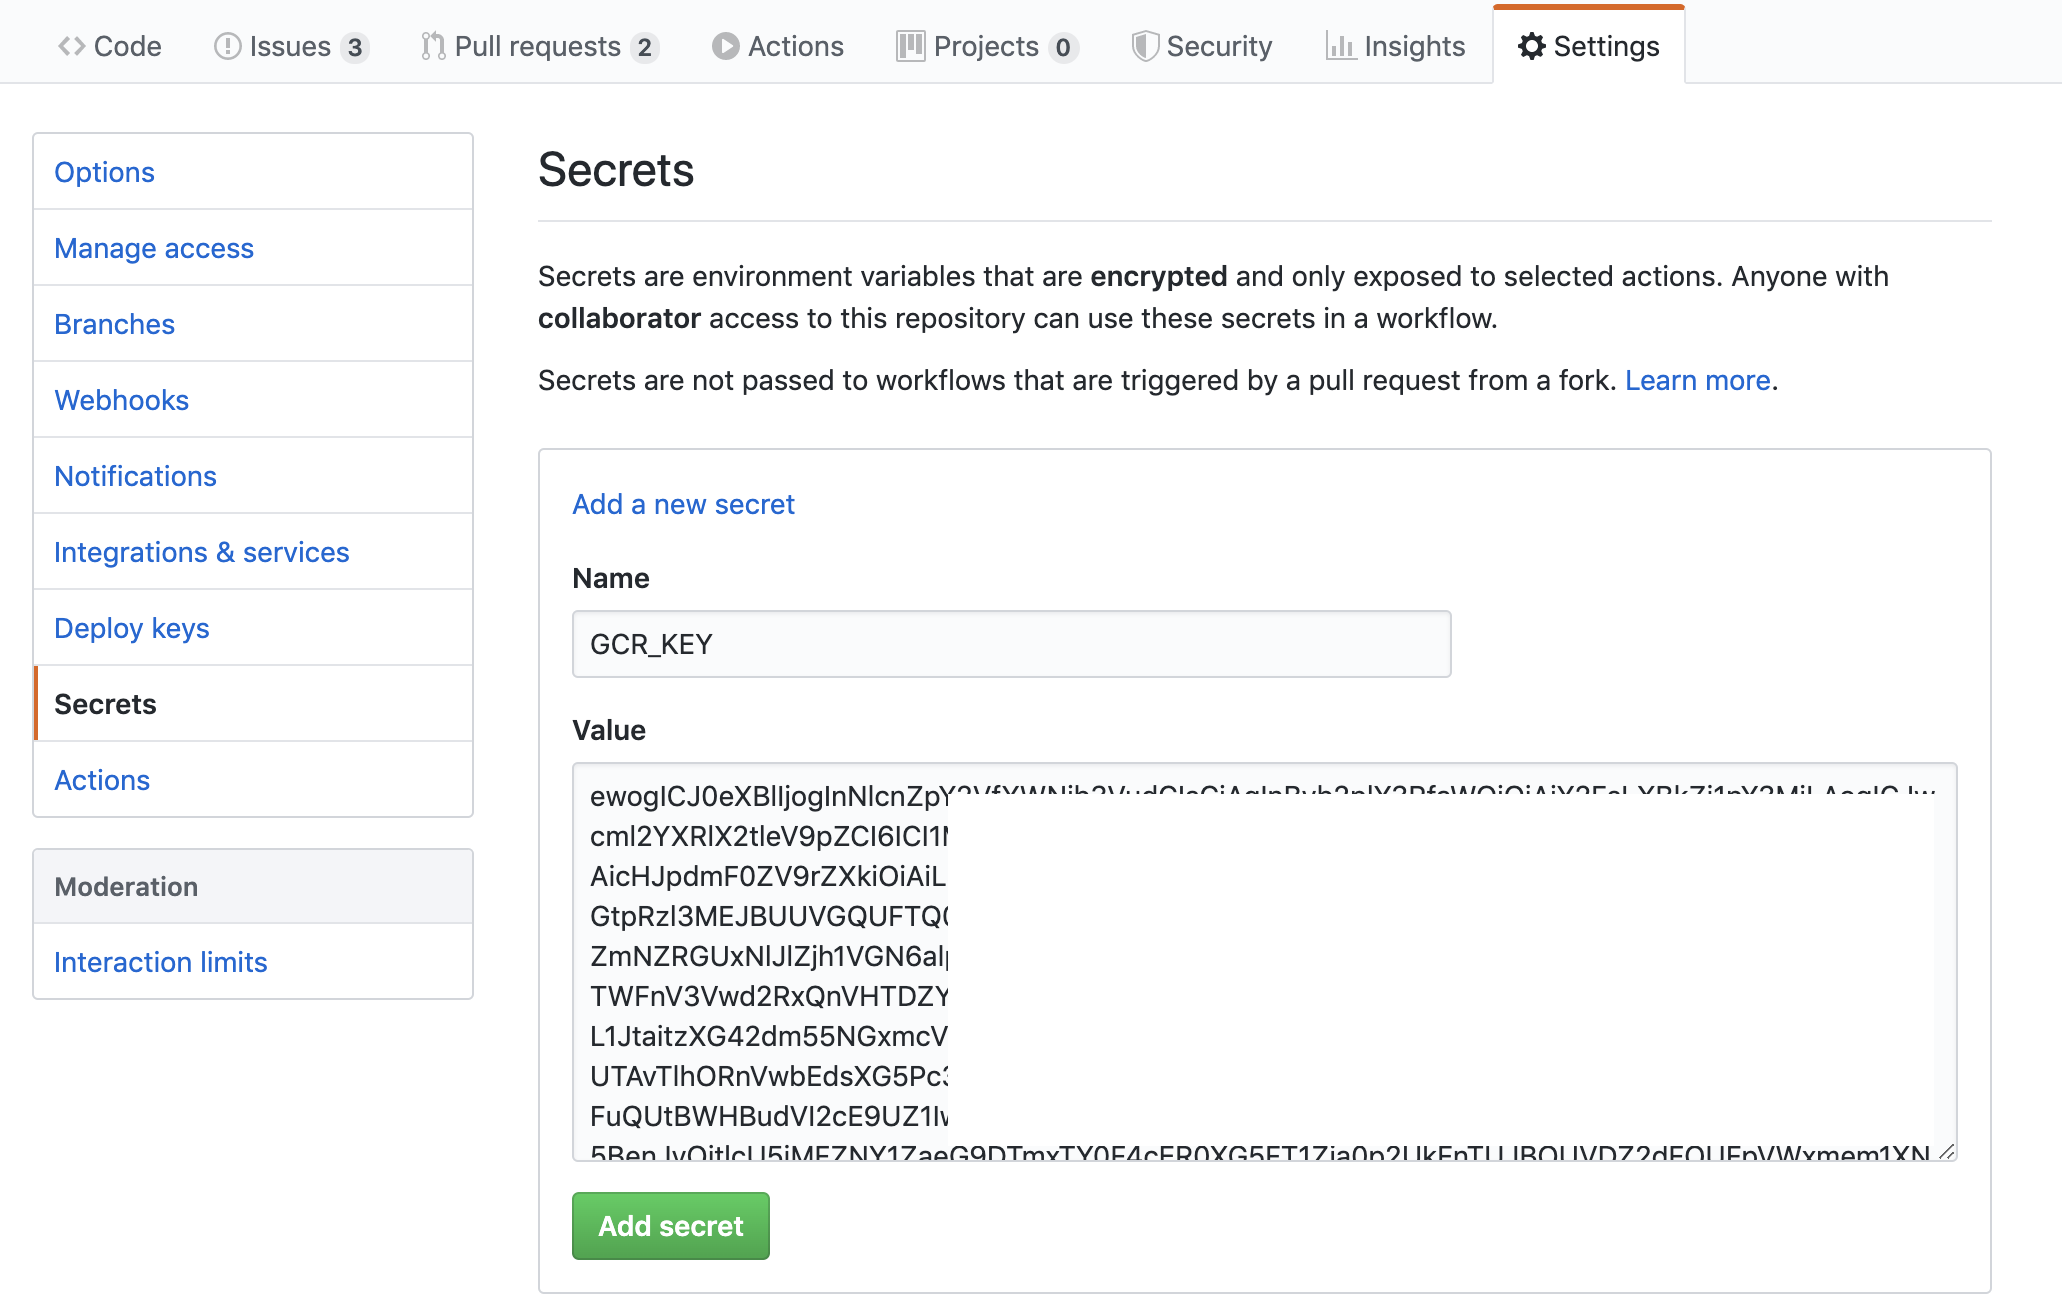
Set the Name to GCR_KEY and the Value to the base64-encoded
version of $PATH_TO_KEY_FILE.

Figure 2: Adding a secret to the Github Project Page Name the secret and add the contents of the secret; in this case the contents should be base64-encoded. Part of the secret in this screenshot is blanked-out, yours will look complete
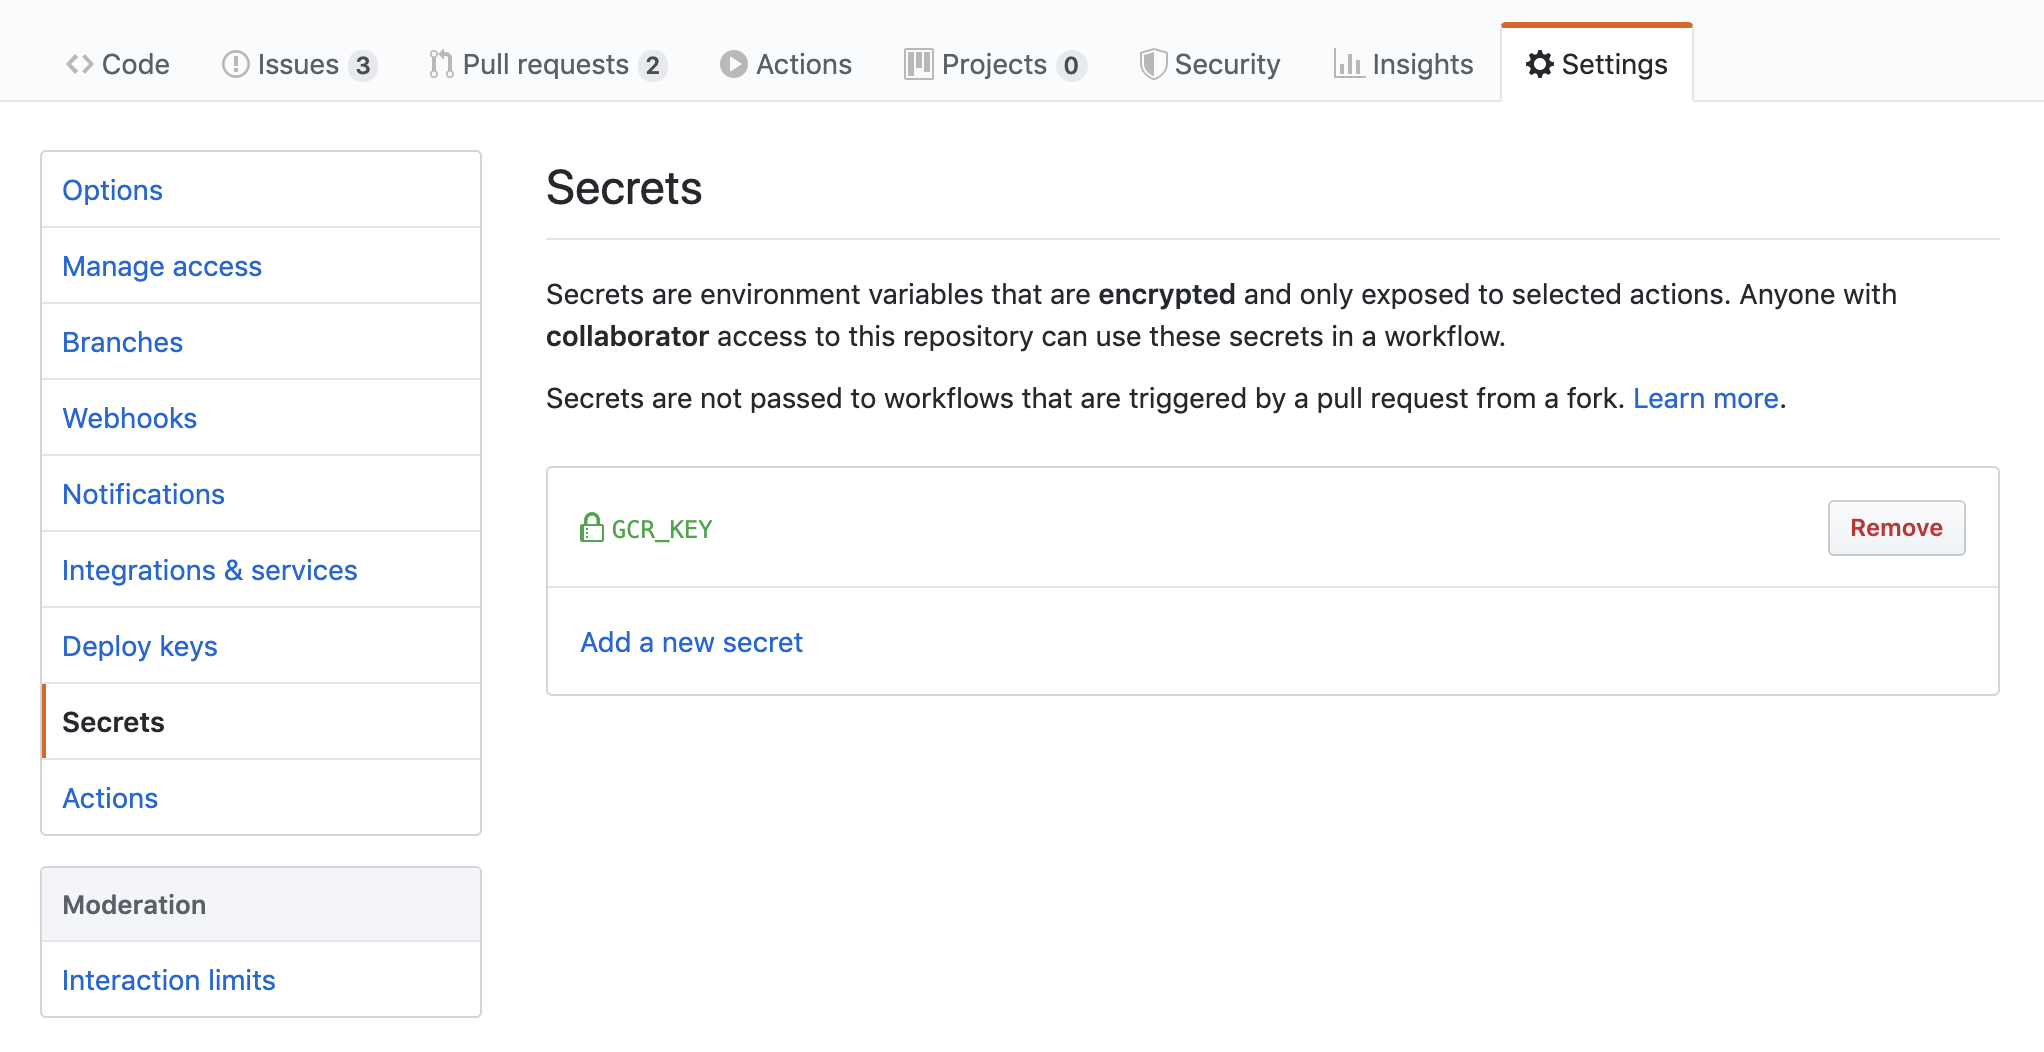
Click the “Add Secret” button and you’ll see your secret’s name in the list.

Figure 3: Listing the secrets associated with a Github project This is the list of secrets for the Github project; here you can see the GCR_KEY secret listed
Now this Github repository can access the Google project matching the key; there may be better security that this, but :shrug: If you have suggestions, find me on Twitter @acaird.
Setting up Github to build your Docker image
Github offers a free tier of CI that includes 2,000 minutes of build time per month, there are more details at the Github Actions page and this blog post. For building Docker images for a small project, this is almost certainly plenty.
I chose to trigger builds when I push a Git tag, but you have the option of starting a build when you push a branch. For more details, see Github’s documentation for events that trigger workflows.
This is all configured by adding a YAML file to the
.github/workflows directory in your Git repository. I called my
YAML file google.yml because that was the name of the example file
I started with. My YAML file looks something like:
name: Build and Push to GCR

on:
  push:
    tags:
      - v*

# Environment variables available to all jobs and steps in this workflow
#  GKE_EMAIL: ${{ secrets.GKE_EMAIL }}
#  GKE_KEY: ${{ secrets.GKE_KEY }}
env:
  GITHUB_SHA: ${{ github.sha }}
  GITHUB_REF: ${{ github.ref }}
  IMAGE: [IMAGE_NAME]
  REGISTRY_HOSTNAME: gcr.io


jobs:
  setup-build-publish-deploy:
    name: Setup, Build, and Publish
    runs-on: ubuntu-latest
    steps:

    - name: Checkout
      uses: actions/checkout@v2

    # Setup gcloud CLI
    - uses: GoogleCloudPlatform/github-actions/setup-gcloud@master
      with:
        version: '270.0.0'
        service_account_key: ${{ secrets.GCR_KEY }}

    # Configure docker to use the gcloud command-line tool as a credential helper
    - run: |
        # Set up docker to authenticate
        # via gcloud command-line tool.
        gcloud auth configure-docker

    # Build the Docker image
    - name: Build
      run: |
        export TAG=`echo $GITHUB_REF | awk -F/ '{print $NF}'`
        echo $TAG
        docker build -t "$REGISTRY_HOSTNAME"/"$IMAGE":"$TAG" \
          --build-arg GITHUB_SHA="$GITHUB_SHA" \
          --build-arg GITHUB_REF="$GITHUB_REF" .

    # Push the Docker image to Google Container Registry
    - name: Publish
      run: |
        export TAG=`echo $GITHUB_REF | awk -F/ '{print $NF}'`
        echo $TAG
        docker push "$REGISTRY_HOSTNAME"/"$IMAGE":"$TAG"
        docker tag "$REGISTRY_HOSTNAME"/"$IMAGE":"$TAG" "$REGISTRY_HOSTNAME"/"$IMAGE":latest
        docker push "$REGISTRY_HOSTNAME"/"$IMAGE":latest
The only change you need to make to this file is to change
[IMAGE_NAME] to be what you want to name your Docker image.
Stepping through this file:
The first section determines what triggers the execution of the rest of the file; in this case, if there is a tag that starts with
vthe rest of the file will be processed, otherwise nothing happens. This is set by the lineson: push: tags: - v*This will also match the tags
victoryandvodka; you could tighten up the regular expression if you’re worried about that; I’m not (also, I might want to trigger a build with the tagvodka, you don’t know).- The second section sets some environment variables for use elsewhere in the processing
- Then we have one job with several steps, the steps are:
- checkout our code
- set up the
gcloudenvironment using the secret we configured in the previous section - set up the
gcloudDocker environment - run
docker buildwith some options (theBuildstep) - run
docker pushto push the image to the Google Container Registry (thePublishstep) twice, once with a tag that matches the Git tag and once with thelatesttag.
I wanted to use the Git tag as the tag for my Docker image, but
github.ref is the full reference; that is, if your Git tag is
v0.81, the tag is refs/tags/v0.81 and that is not a valid (or
desired) Docker image tag. The export TAG ... line splits the
input on / and takes the last field which is, in this example,
v0.81; happily, this is the tag we wanted all along. Hooray.
Once you have a YAML file in the right place, git commit it and
push it to Github. Whether that triggers a build or not, Github
will parse the YAML and make sure it is valid. To check this, go to
the “Actions” tab of your Github project and look at the list of
events. If there is an error in your YAML the name of the event
will be the file name, not the name of the job. Clicking that event
will show you your file with a message like:
Check failure on line 1 in .github/workflows/google.yml

GitHub Actions / .github/workflows/google.yml

Invalid Workflow File
You have an error in your yaml syntax on line 25
If you commit the YAML file and there are no errors there won’t be anything (or, if you’ve commited it before, anything new) listed in the “Actions” tab.
Initiating and Monitoring a Build and Push
The initiation part is easy - simply push a tag (if you’re using the
example above) or a branch (if you switched the on: push: section
to branch: <something>). Github will then start running the build
rules in the YAML file in your repository.
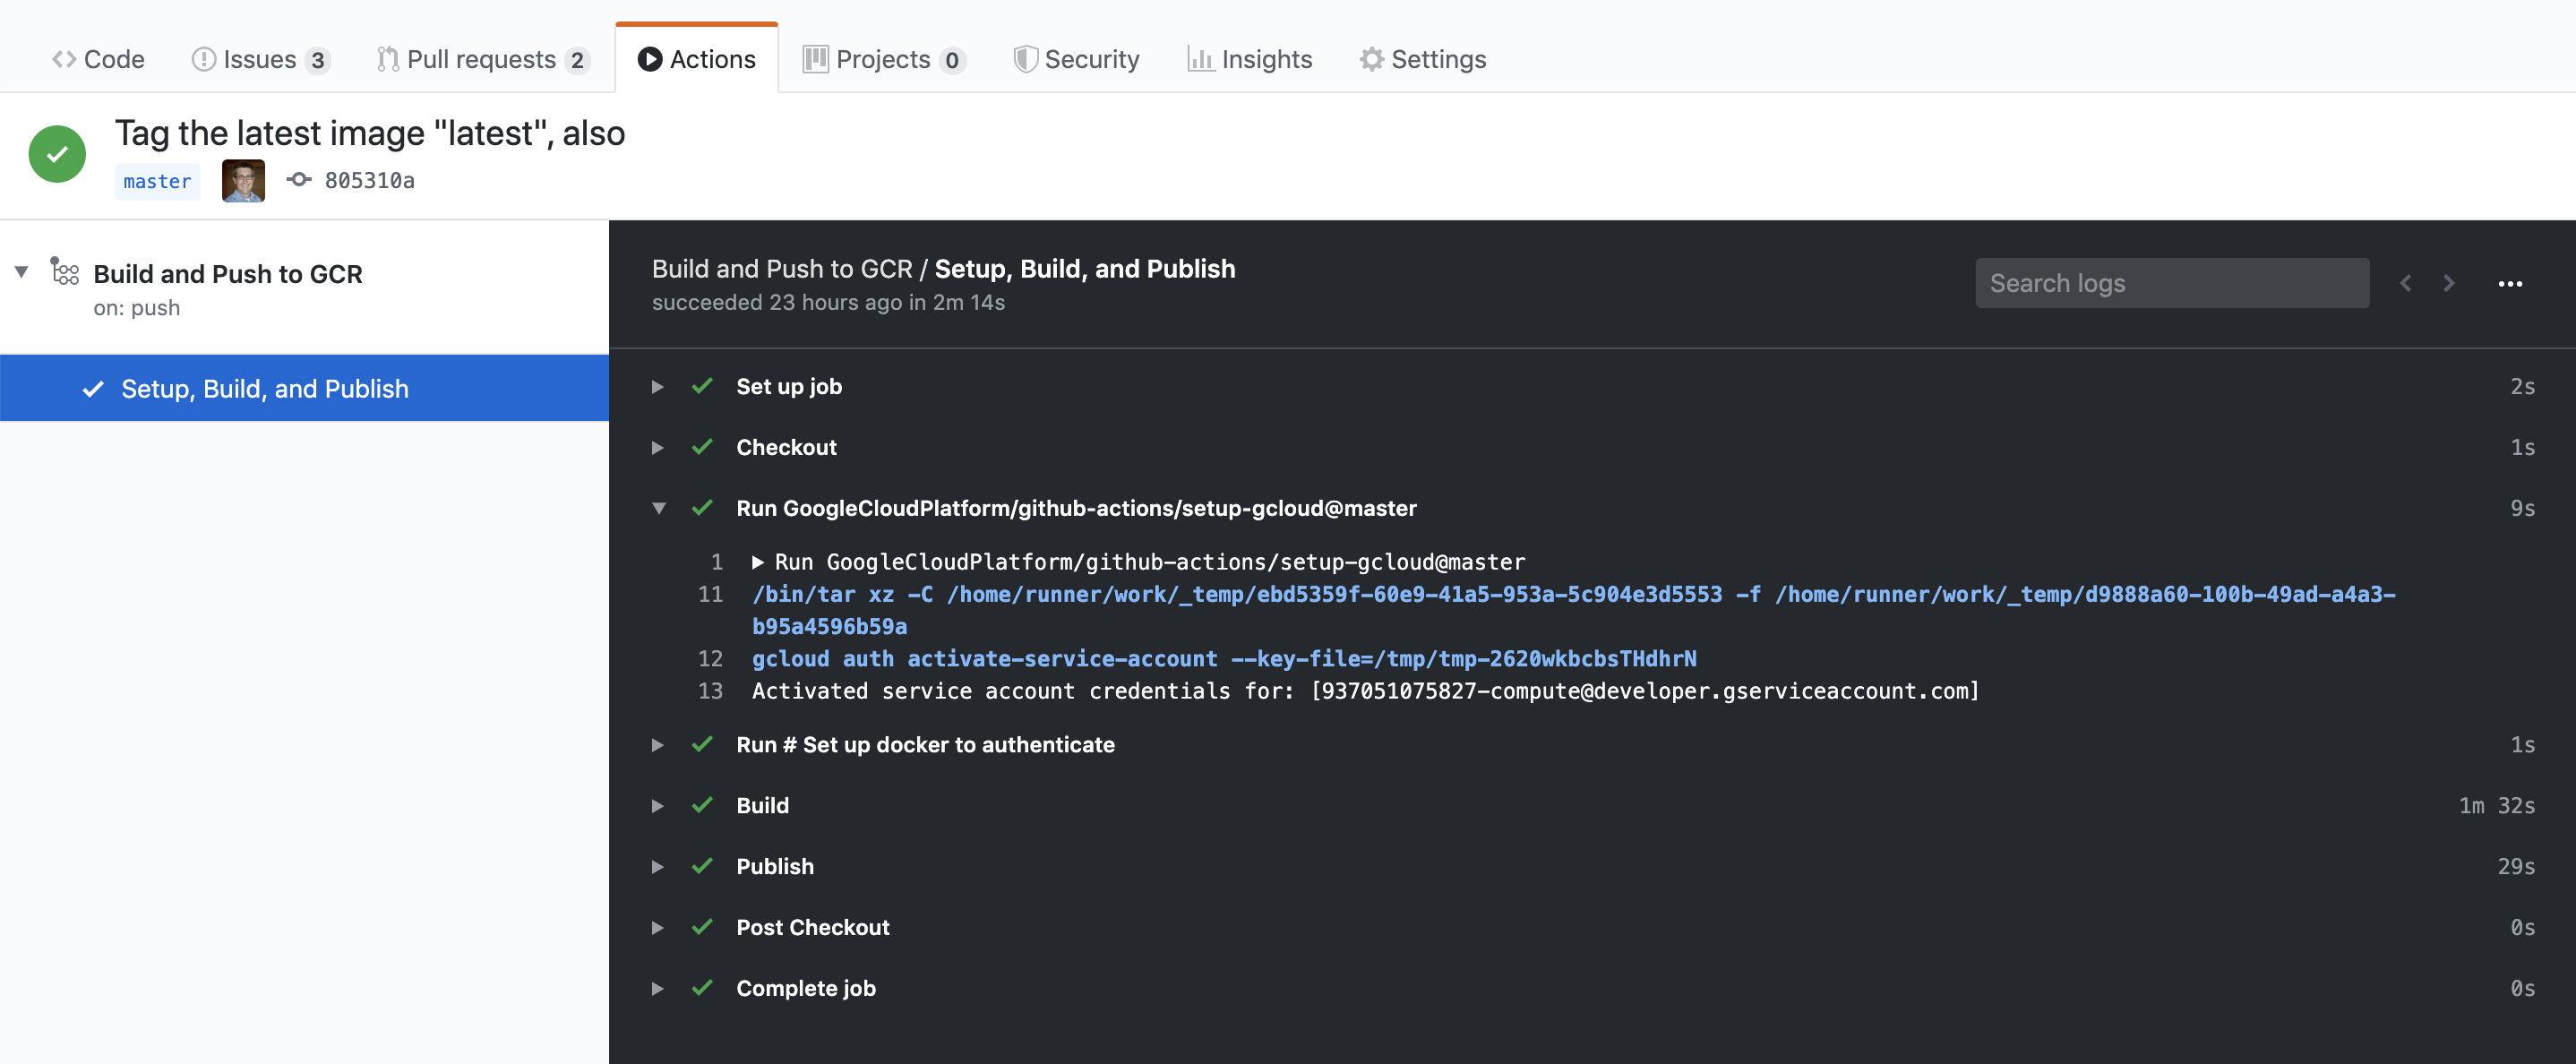
The monitoring is a little more involved, but not difficult - the
“Actions” tab in your Github project will list the jobs, click the
top one (the most recent one) and then, on the left, click the Job
name; if you followed the example above, it is “Setup, Build, and
Publish”, if you changed jobs: <jobname>: name:, it will be what
you set that to. That will open what looks a little like a terminal
window with the steps of the job in it, each one will get a
checkmark as they succeed. You can monitor the steps of the job in
real time.

Figure 4: The Github Actions monitoring window Here you can see each step with its expando-triangle; clicking the triangle will show the logs for that step of the job. On the left you can see the name of this Action (“Build and Push to GCR”) and the name of the one in the job (“Setup, Build, and Publish”)
To confirm that the image is actually pushed to the Google Container Registry for your project, you can run:
gcloud container images list --project MyProject
which will report the images in MyProject, like:
NAME
gcr.io/MyProject/MyProject
Only listing images in gcr.io/MyProject. Use --repository to list images in other repositories.
Once you have the list of images (from the NAME column) you can
then run container images list-tags:
gcloud container images list-tags gcr.io/MyProject/MyProject
to see what images are available. You’ll see something that looks like:
DIGEST        TAGS              TIMESTAMP
e3ae68fe03b8  latest,v0.84      2020-02-11T15:14:39
b7baca4e21ec  v0.83             2020-02-11T15:09:08
which confirms that properly tagged images are being pushed to GCR.
Using the new image in your Google Cloud Run instance
I don’t automatically switch to the new image in my Google Cloud Run instance in the “push” step of the CI (but more on this later). I guess I’m old and conservative and this new-fangled CD makes me a little nervous. Also, these graphical web pages are not my favorite. Also, get off my lawn.
To switch to your new image you can use the Google Cloud Run web pages, and I’ve done this to good effect before. We aren’t doing that now, because command line tools are better (for one, they can go into shell scripts or Github actions YAML files).
Updating the image used by a Google Cloud Run project isn’t that complicated, there are only a few steps:
- Make sure you have an image tagged
latest; if you’ve gotten this far and followed the steps, you do. You don’t really have to, but you should know what tag you want to use. Confirm the available images
gcloud container images list-tags gcr.io/MyProject/MyProject
Find out what region your Google Cloud Run project is running in:
gcloud run services list --platform managed
Update the image to the one currently tagged
latestby typing:gcloud run deploy MyProject \ --platform managed \ --region MyRegion \ --image gcr.io/MyProject/MyProject:latest
These last two steps can be done in a shell script that looks like:
#!/bin/bash
PROJECT=MyProject
REGION=$(gcloud run services list --platform managed --format=flattened | \
             grep metadata.labels.cloud.googleapis.com/location | \
             cut -d: -f2 | \
             sed 's/\s+//')
if $(echo $REGION | wc -l) -gt 1; then
    echo "Using the last region in the list of regions"
    REGION=$(echo $REGION | tail -1)
fi
gcloud run deploy $PROJECT \
       --platform managed \
       --region $REGION \
       --image gcr.io/${PROJECT}/${PROJECT}:latest
Such a shell script could be added as a step in the Github action YAML file in a section that looks like:
- name: Deploy
  run: |
    PROJECT=MyProject
    REGION=$(gcloud run services list --platform managed --format=flattened | \
                 grep metadata.labels.cloud.googleapis.com/location | \
                 cut -d: -f2 | \
                 sed 's/\s+//')
    if $(echo $REGION | wc -l) -gt 1; then
        echo "Using the last region in the list of regions"
        REGION=$(echo $REGION | tail -1)
    fi
    gcloud run deploy $PROJECT \
           --platform managed \
           --region $REGION \
           --image gcr.io/${PROJECT}/${PROJECT}:latest
After you’ve deployed the new Docker image, you can confirm that it is being used:
Check that there is a new revision of the service:
gcloud run revisions list --region MyRegion --platform managed
Once you know the name of the new revision, check what image it is using:
gcloud run revisions describe \
     --region MyRegion \
     --platform managed \
     --format=json MyProject-00004-hab | \
  grep image
and you should see that the SHA256 hash of image, as reported in
imageDigest, matches that in the output of thecontainer images list-tagscommand.
Accessing the URL of your service will now reflect the changes you committed many steps back.
Summary
While there is a lot here, there aren’t too many steps at a high-level:
- Grant Github the ability to push Docker images to your Google project’s Container Registry
- Write some instructions in YAML for Github to follow so it builds a Docker image and pushes it to the appropriate container registry
- A few manual steps to have your Google Cloud Run instance use your new image